Showing posts with label Thank you. Show all posts

Jul 1, 2012

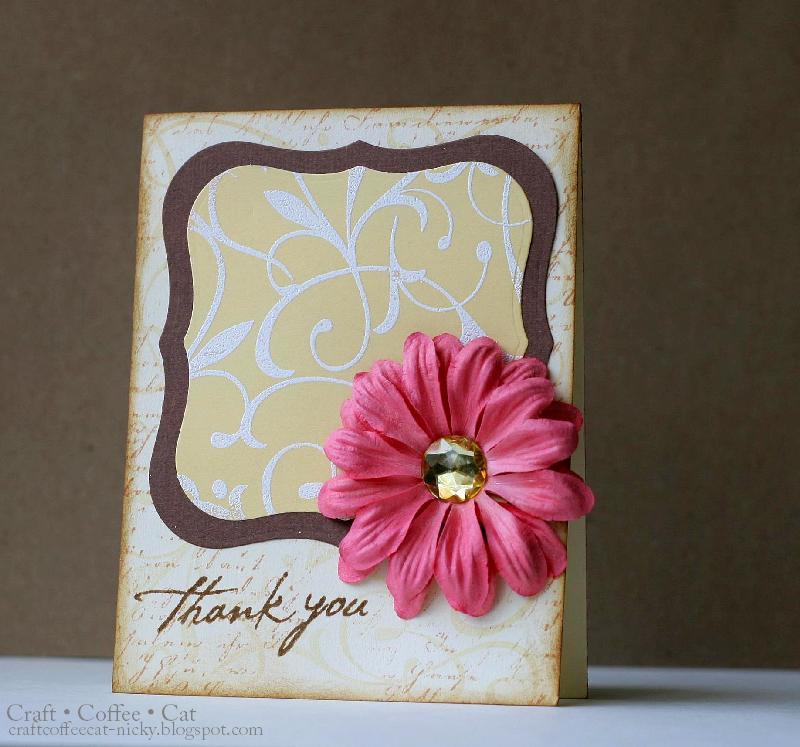
Thank you Cricut flower

A hybrid card. Hero Arts + Cricut.


Supplies:
Stamp: CL142 Thank you -Hero Arts
Cartridge: Floral Embellishment

Thanks for looking.
Nicky

Sep 21, 2010

Tuesday 2nd post

I have a feeling that it's going to be a 2nd post weekend. Haha~~
I made this card for The Play Date cafe Challenge PDCC47. I haven't use this butterfly stamp set for a while and I am glad it fits this challenge. Sorry for a bad picture. It's a cloudy day and lighting is not good. I had hard time get a clear shot. I will try again in the afternoon. Wish my luck to get a good lighting.

I run the white card base through my Big Shot with Sizzix emboss folder. Die cut 4 color scallop square and white emboss the butterfly on it. Die cut the turquoise eyelet lace border from Papertrey ink and die cut the oval and scallop oval for sentiment.

Thank for stopping by. Stay tune, I have a give away coming up tomorrow.

Sep 15, 2010

Winner and new candy

Sorry for the late post and this will be a quick one.

First! We have a winner of my blog candy.....you are not gonna believe this. The winner is my dear Hero Arts friend, Rosemary. Congratulations, I flickr you.

Second! I have a card to share. I made this one for Card Patterns Sketch81. Also use the color from this week's Color Throwdown#110 Some how the god wood stamp jumped into my head when I saw this sketch. This is my finished card. All stamp Hero Arts.
I didn't put a supply list and instruction. Feel free to let me know if you have any question. I will try to answer ASAP.

Another giveaway. Hero Arts CL429 Simple Handmade stamp. The thimble is too cute.
Here are few reminders:
**You have to be a follower to my blog.

**Leave a comment on this post for this prize. I will only draw on this post.

**You have until Wednesday September 22, 2010 to enter to win.

I would very much appreciate it if you would mention my giveaways this week on your blog, facebook, twitter your choice. You do not have to do a separate post about it or even share photos maybe just mention it with a link. I will do this small giveaway more in the future. Come back often.
****This give away is closed. **** 

Sep 2, 2010

Thank you

Made this card last night for few challenges. I am using Color Throwdown CTD108, and for Really Reasonable Ribbon's Challenge:Flower+ribbon.
I use Hero Arts CL443 Good Thought set. Sentiment from CL435 So Artsy.
Make A2 kraft card base and trim light yellow cardstock. Round both corners. Adhere together. Stamp the flower background on coffee cardstock with watermark ink. Emboss with Sunny Yellow Pastel embossing powder. Round corner and adhere on card front. Cut a slit on card base, thread ribbon and tie a bow.
Stamp the big flower on white CS and clear emboss. Rub Brushed Corduroy Distress ink with blending tool to do emboss resist. Cut out and attach pearl brad. Adhere flower on ribbon with glue dots. Add pearls.
Stamp sentiment on light yellow card piece and adhere on coffee cardstock. Pop off on card front with foam tape.
Close up to see the colored flower center. I use Clear Star Gelly Roll from SAKURA.
TFL~

Aug 28, 2010

Amuse Marigold Thanks

Happy Saturday!!! I hope you all have a wonderful weekend. I just got home from a wonderful class teaching by Julie Ebersole from Amuse. She is  SUPER talented and full of energy. This is my first time taking her class I LOVE it. I want to take this card to say thank you to Julie for a wonderful class.

There is a wonderful surprise for me. I met talented and sweet Ashely, Cherry Hill Design. She sits right across my table and we are working together. So exciting. This is the first I actually meet someone I know from the blog in person. (So sad, we don't have a camera with us to "keep" the moment.) I know I will take more Julie's class and I promise next time when I meet Ashley I will make sure we get the photo DONE.

Take home two beautiful stamps Marigold solid and Marigold. I am so inspired by Julie's card and made this one for PDCC44. I have this week's "colour horribilis challenge" stuck in my head for few days. I have no clue how to put these three color together and I think Amuse stamps are perfect for this challenge.
I stamp Marigold with watermark ink on Navy blue cardstock and use clear embossing powder.Trim a piece of mustard cardstcok and adhere on card base. Trim a white panel, ink up Marigold solid using two color, Mustard Seed distress ink (Ranger) and Pink A la mode(Hampton art). Stamp sentiment(So Artsy from Hero Arts) with Ocean Depth(Versa Magic). Adhere on card and add pearls.

Note:Really it's a bold bright pink (see the color Here) but after it mix up with the mustard seed it turned into kind of orange tune to me. It's a beautiful mistake and I hope this still qualify for the challenge.

Aug 13, 2010

Random Hero Arts

Happy Friday, I have a random card to share today. Some how I never really know how to cooperate the coral flower into my card. I made one for Embellish Magazine's Label challenge and fell in love with it. So I made another one with the same coral flower but with a different design.
Thanks for looking. Have a great weekend!!

First one, I use a beautiful Roam Fabric Covered Brads from K&Company. Isn't it cute? It goes with my brown ribbon perfectly.

Second one, I use a giant gem I got from Michael's. I color it with marker to give it a different tune.This is the one I made for Embellish Magazine's Label challenge in June. You can fine my post here.

Please let me know if you need any supplies information.

Jul 29, 2010

Second post today

Continue the Paris post.
Third one. I submit for Paper Craft Go-to Sketch#5 This is a fun sketch. Give it a try. You have until Aug 02 to submit. This one is quick and easy. I love the pattern paper again cork. I am inspired by Ashely's Down hill bicycle card here.

I round the vintage cream card base from PTI. Die cut big circle from pattern paper called Linen closet from Die cut with a view. Die cut small circle from cork. (I got mine from Michael's with the 40%off coupon. YA~) Stamp sentiment with water mark ink and white embossing it. Stamp Eiffel Tower with Vintage photo Distress ink. Mat with the big circle and adhere on card base. Tie 3 twines together and add embellishment with glue dots.
Close up to see the cork. It's easy to trim,  die cut and stamp. The same as you will do on the paper. I do be more gentle when I run it through my Big shot. You don't want to crumble the edge.
Last one is for Hero Arts another theme, Food. See the chocolate? Today is the last day you can enter the theme, Food and Travel. If you do find time to do some craft. Make sure to upload before 11:59 PST to Hero Arts Flickr page and tag with July2010B. You can win a $50 shopping spree. Also I use 2S4Y's Laura's sketch57.

Ink up the edge of card base. Trim rectangle kraft panel. Trim two rectangle panels of pattern paper from October Afternoon, Thrift shop. Pierce around the panel, adhere on kraft panel. Cut two panels of vintage cream card stock. Stamp chocolate and ink up the edge. Stamp Chocolate again on pattern paper and cut out the top and bottom, adhere on focal image. Color the box with markers. Pop off  with foam type. Stamp the Merci, ink edge, adhere. Tie ribbon, lace and adhere on kraft panel. Mat the panel on card base. Add embellishment.
Close up , I add Glossy accent on the chocolate. Don't they look yummy?

I also make a book tag for the one and I plan to give it to a friend who loves chocolate and reading.

Hero Arts Paris set

Hello everyone, this is an excited day. First I want to share a BIG news with you. I am Hero Arts Nancy's Win a day Pick. I am so honored and excited. Can't wait to get started.

Today I want to share a card set I've been working on for few day. I focus on my new stamp set, Paris from Hero arts. I enter these for HA July theme, Travel and Moxie Fab World's Card style week Challenge. You have until Aug 02 to enter your card,there is still time and I hope you can play along.(I just realized it's a too long post. I will move two cards to another post.)
First one, this is my favorite of all. I am not too shabby and vintage girl and this is a challenge for myself to try a different style. I really like how it turn out.

I trim pattern paper panel from a set, Le Creme from Die cut with a view, adhere on vintage cream card base from Papertrey Ink. Ink edge. Cut a slit on top of the card, thread lace and adhere. Trim a rectangle card stock, stamp lace background with Vintage linen Distress ink and Eiffel Tower with Black soot Distress ink. Ink edge with Vintage Linen and Tea dye Distress ink. Pop off the focal image with foam type on card front. Stamp Merci with Midnight black pigment ink. Add gems.

Second, This is my second try. I don't like the first card so I keep the same design and layout just change the color to come up with this one. This is my first time try on the Collage-stamping. I am inspired by carol's cards here. She is the queen of Collage stamping. Check out this card here. Absolutely stunning.

I use Distress inks in this card. I start tamp the Eiffel Tower and sentiment with Vintage photo and clear embossing them on white PTI card base. Stamp the big butterfly with watermark ink and clear emboss. Stamp the lace background, Starburst lace, Old letter writing, butterflies from Antiques Engravings with different ink on the card. Ink edge with Antique linen and Tea dye. Wipe off the extra ink on embossed images with baby wipe. Tie on twine and adhere lace. Adhere the panel on PTI kraft card base. Combine brad and flower, adhere on card front.

 Here is the "Failed" card. I use white embossing powder on the sentiments and Eiffel Tower. They didn't pop as I expect.You can barely see , Paris. So I call it a fail. Just want to put this one on so you can compare with the one I like. 

Fabulous Ashely Newell, my all time favorite designer. She shares great tips of how to photo your project on her blog , A New Design. You don't want to miss this. I tried her tips and adjust my photo routine. Let me tell you, it really works. Don't you think my photos look a lot better.

Thank for stopping by and have a great day.

Jul 6, 2010

Thank you Sunflower.


Hi there~ I hope you all have a nice 4th July weekend. The weather wasn't too nice. We had a wonderful BBQ dinner with friend and the rain didn't ruin our good mood at all. I am glad it wasn't too much rain and we still had the nice fireworks on the lake.

I am sharing a Sunflower card and hope this will bring us some sunshine.Card size:4.5"x4.5" Make card base from black cardstock. Trim pattern paper and adhere on card base. Attach brads. Die cut circle and scallop circle. Stamp the sentiment in Midnight black and let dry. Stamp the sunflowers in Sunflower yellow and clear emboss. Adhere together and adhere at card front. Tie on ribbon.

 
Supplies:
Stamp: (Flower Gallery)Penny Black, Pigment Ink:(Midnight Black, Sunflower Yellow)Tsukineko, Pattern paper:(Flower Shower)DCWV, Dies: (Circle, Scallop circle) Spellbinders, Clear emboss powder:Joann, Accessories: (Brads, Ribbons) Michaels

Apr 1, 2010

Get Sketchy#31


Made this card for Get sketchy#31
I usually don't do such a dark color but once in a while. Just change the atmosphere a bit.

Supplies:
Stamp:(Thank you, Antique Engravings-butterfly) Hero Arts, (Thank You Icon & Border) Inkadinkado, Ink:(Midnight Black) VersaMagic, (Super fine detail emboss powder) Ranger,Dies :(Vintage) Cuttlebug, Distress Stickles (Walnut stain) Ranger

Nov 25, 2009

CPS143


Made this one for CPS143.

This week is all about colors. I put myself all in the color mood and still want to find some time for some sketches. I feel more comfortable playing with sketches than colors which means I need to play more color challenges. :)  Can't let the colors beat me!!!

Use Jennifer McGuire's butterfly again. Yes. I love it so much and I just can't stop making them.

I always seek for challenges to push myself more and I am really grateful for all the people who came up with those challenges.Thank you all for the hard work. I am really appreciated.

Nov 6, 2009

CPS 140


Made this one for CPS 140  I've been trying to us this Eyelets Pendants and the paper. Really want to make a soft tune card. This is came up together when I organized my messy paper pile. 
This is also inspired by a good positive friend. Just want to say thank you for her supporting. She always knows how to bring sunshine to me when I drawn in the blue mood.


Supplies:
-->
Stamp: Inkadinkado -Maison Frames, Stampendous - Formal Frames (Sentiment)
Paper: Me & my big idea Fashion District,
Accessory: Spellbinders Eyelets Pendants, Paper Shapers Corner Adorner Shaped Punches-Victorian Lace, Diamond Sticker